SpringBoot 를 사용해 DB 연결하기 - H2
Connecting to a Database with SpringBoot - H2
많이 사용되는 데이터베이스인 MySQL 사용에 앞서, 테스트를 위해 H2 데이터베이스를 사용해서, 간단한 로직을 작성 해 보고, 테스트까지 해 보려고 한다
Before using MySQL, which is a widely used database, I'm going to use the H2 database for testing purposes. I'll write some simple logic and run tests with it.
SpringBoot 패키지 관리하기
Managing SpringBoot Packages
나는 Gradle로 관리 패키지를 관리 하려고 한다. 이전에는 Maven에서 관리를 했었지만, 사용하다보니 Gradle이 좀 더 직관적이고 편하다는 느낌을 많이 받았다. (사실, 패키지 이름만 같다면 상관없을 것 같다)
I'm going to manage packages with Gradle. I used to manage them with Maven before, but after using both, I've found Gradle to be more intuitive and convenient. (Actually, it doesn't really matter as long as the package names are the same)
build.gradle 파일에서 아래와 같이 세팅 해 주었다
I configured the build.gradle file as follows
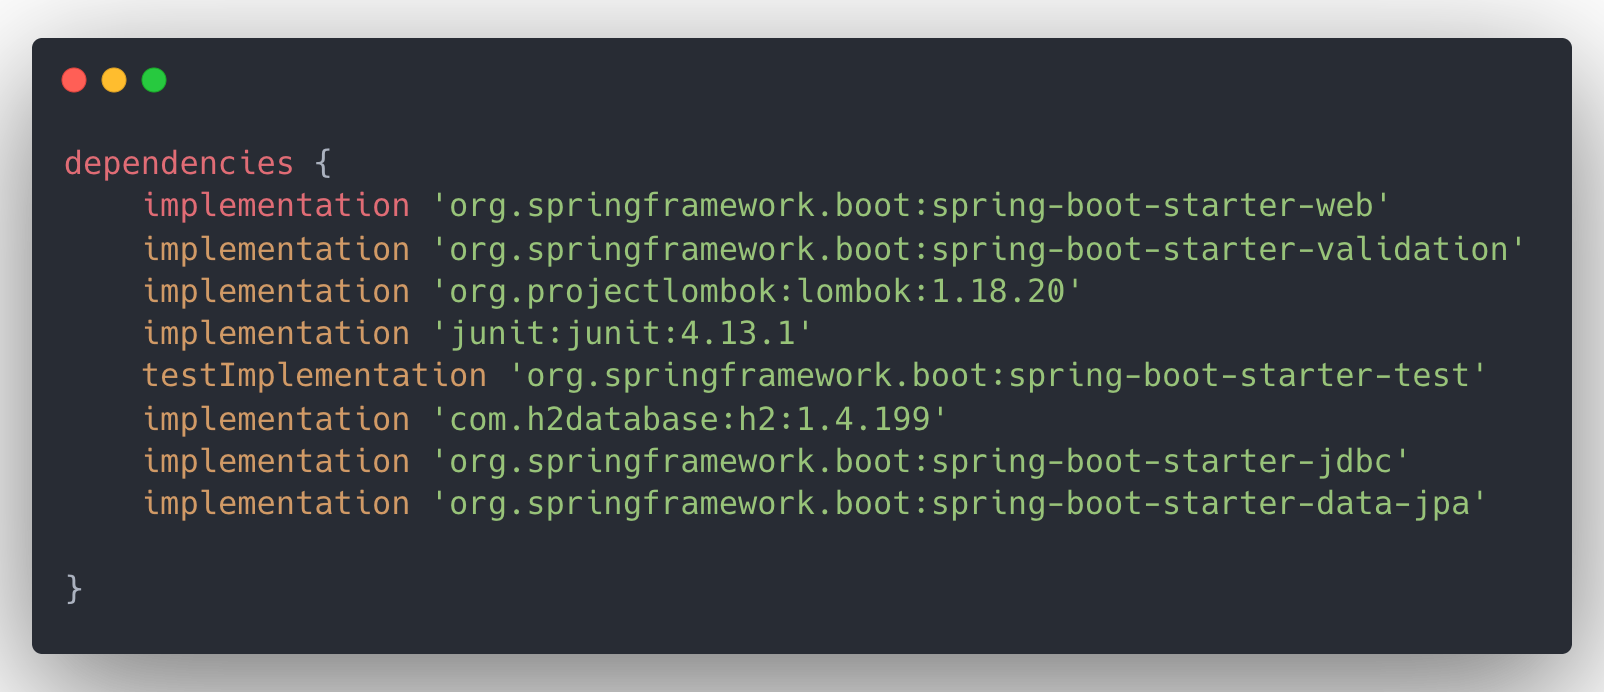
Dependency 설정이 완료가 되었기 때문에, SpringBoot가 잘 실행이 되도록 설정값들을 아래와 같이 넣어주자
Now that the dependency configuration is complete, let's add the configuration values below to ensure SpringBoot runs properly
가장 처음 세팅을 할 수 있는 파일은 application.properties 이지만, 나는 application.yml을 새로 만들어 Hierarchy를 표현해서 보기 편하도록 작성했다.
The first file you can use for configuration is application.properties, but I created a new application.yml file to express the hierarchy in a more readable way.
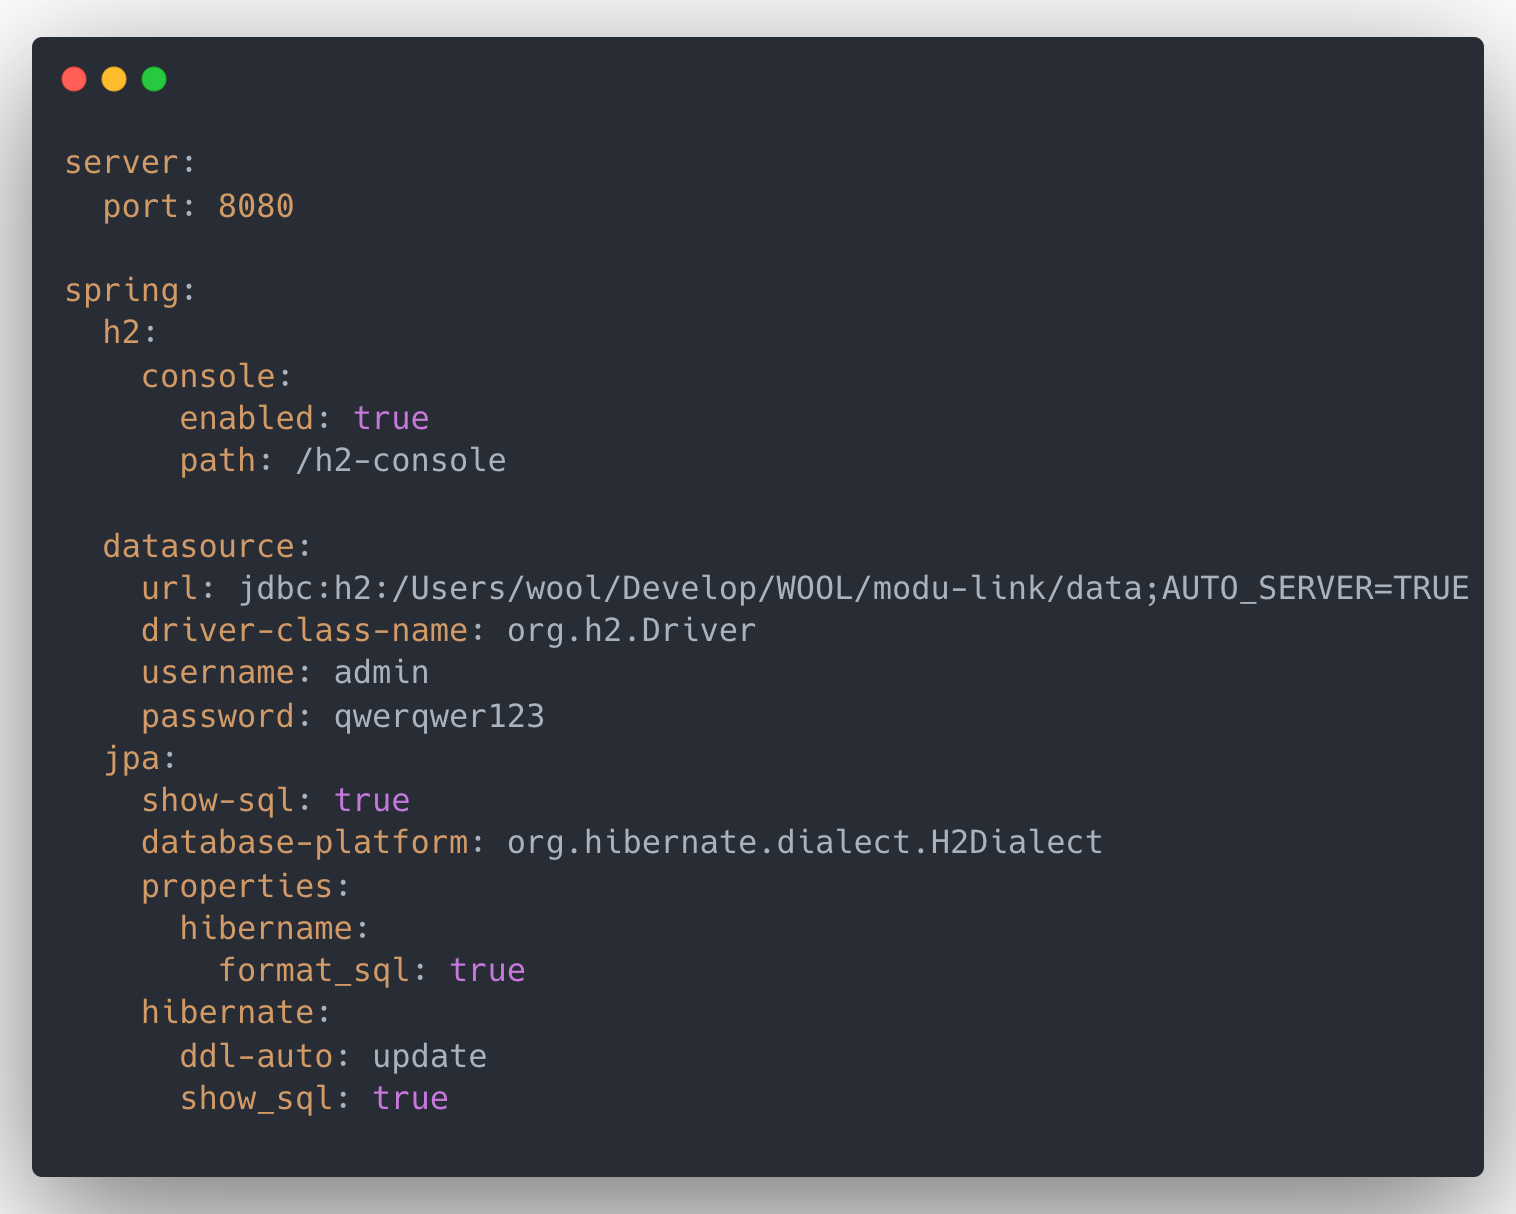
세팅이 완료되었기 때문에 이제 간단한 application을 만들어보자
Now that the setup is complete, let's create a simple application
Model 생성하기
Creating a Model
데이터를 넣기 위해서는, 데이터를 저장 할 수 있는 테이블을 H2에 만들고 데이터의 형태를 명시 해 주어야 한다
To insert data, we need to create a table in H2 that can store data and specify the data format
기본 패키지 안쪽으로 model 패키지를 만들고, 내부에 UserModel을 생성했다.
I created a model package inside the base package and created a UserModel inside it.
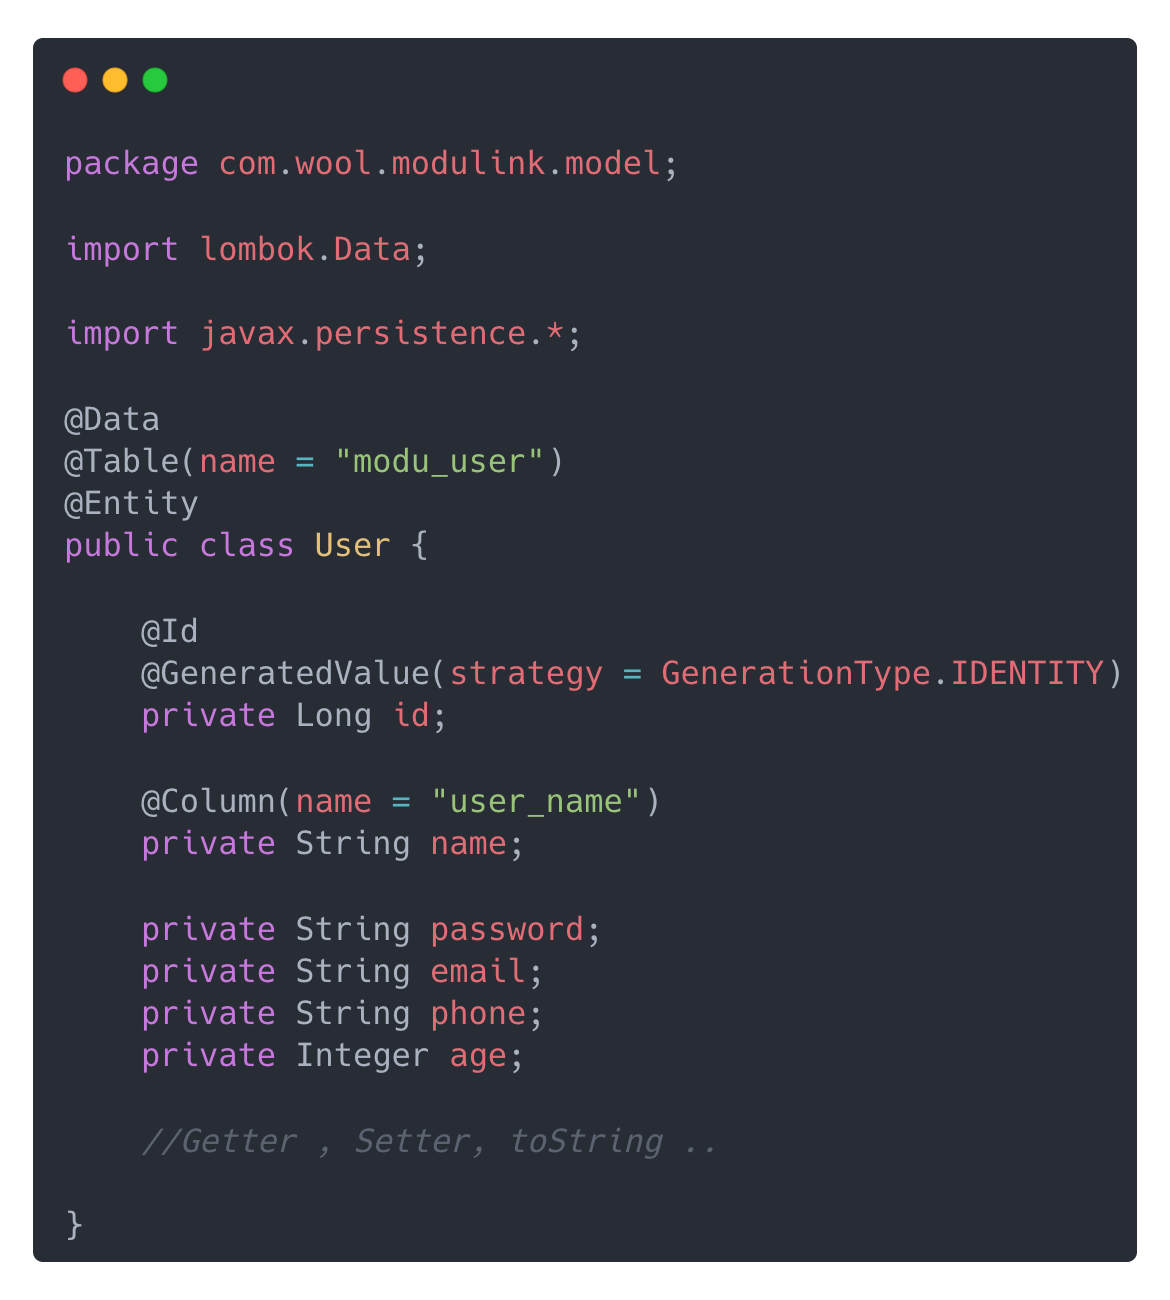
모델은 가장 기본적인 User를 나타내는 것들을 사용 해 보려고 한다. 이것을 기반으로 나중에 로그인/로그아웃/회원가입 등 여러가지 서비스로 확장 해 볼 수 있을 것 같다.
The model will use the most basic elements that represent a User. Based on this, we can later expand it to various services such as login/logout/registration.
Repository 만들기
Creating a Repository
위에서 생성 한 User Model을 가지고 Repository를 만들어주자. 지금은 기본적인 Save Method를 조금만 개선해서 테스트 해 보려고 하기 때문에 큰 작업은 필요 없다
Let's create a Repository using the User Model we created above. Since we're only going to slightly improve the basic Save Method for testing, no major work is needed
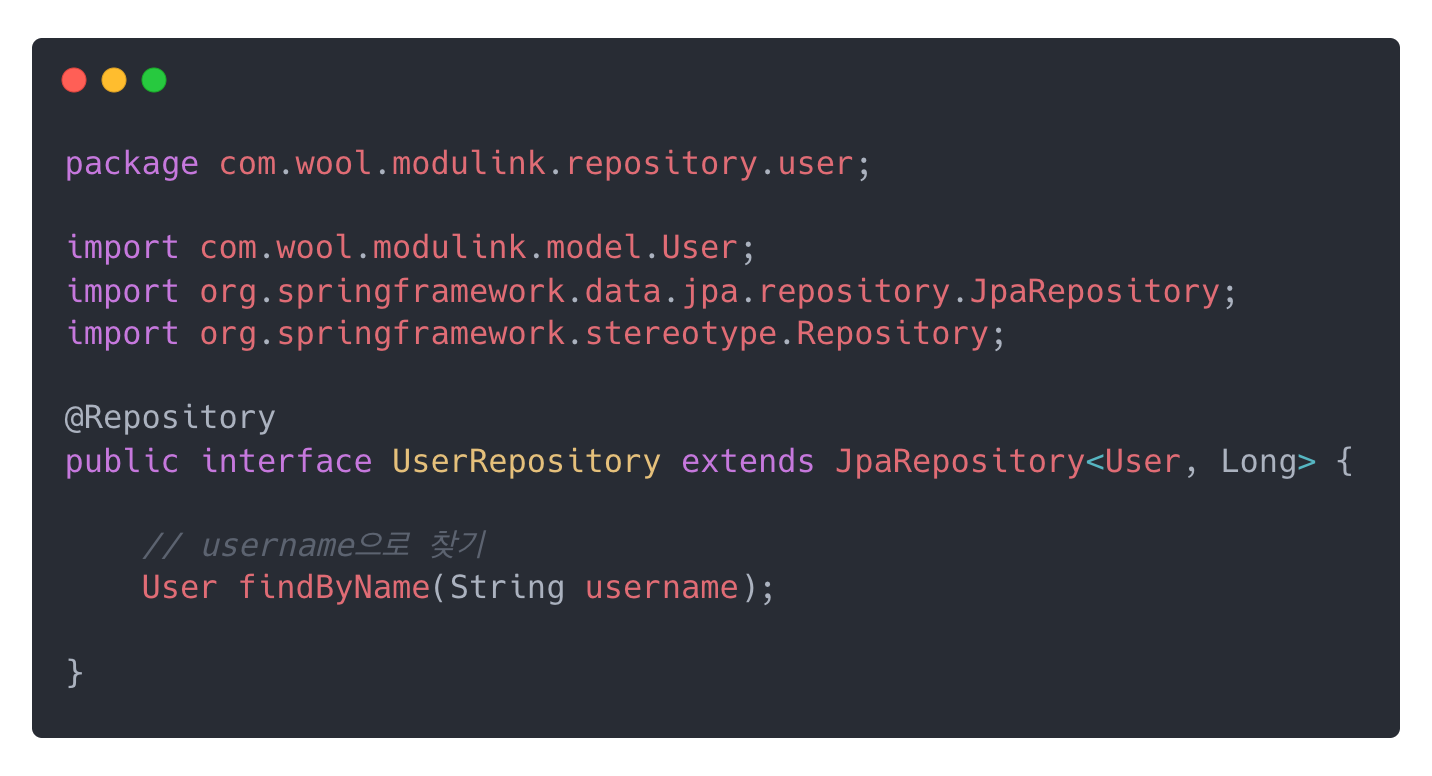
@Repository 어노테이션으로 레포지터리를 나타내어주었고, JpaRepository를 상속받아 기본적인 메서드들을 사용하고, findByName메서드를 만들어서 username으로 찾을 수 있도록 함수를 만들어주었다
I marked the repository with the @Repository annotation, extended JpaRepository to use basic methods, and created a findByName method to search by username
Test Class 만들기(Junit4)
Creating a Test Class (Junit4)
위에서 생성한 Repository를 가지고 간단한 테스트를 해 보자. User 모델을 가지고 CRUD 테스트를 해 보려고 한다.
Let's run some simple tests with the Repository we created above. I'm going to do CRUD testing with the User model.
Create 는 데이터를 생성하는 것 이기때문에 Table 생성과 Repository를 잘 작성했는지에 대해서 테스트 해 볼 수 있을 것이다. 때문에 선제조건이 크게 필요하지 않을 것 같다
Since Create is about generating data, we can test whether the Table creation and Repository were written correctly. Therefore, no significant preconditions are needed
다만 Read, Update, Delete는 데이터를 찾아서 읽고, 수정하고 삭제하는 과정이기 때문에 Repository의 함수로 가져온 데이터의 유무가 중요하다.
However, since Read, Update, and Delete involve finding, reading, modifying, and deleting data, the existence of data retrieved by the Repository functions is important.
이번에 진행 할 때는 테스트코드에 실행 순서들을 입혀서 데이터를 생성 한 후에 이어지는 동작들을 테스트 해 보려고 한다
This time, I'm going to apply execution order to the test code so that subsequent operations can be tested after data is created
여기서는 Junit4를 사용한다. 사용하려고 하는 기능들이 Junit5에서는 좀 더 편하게 수정되었다. 이부분들은 다시한번 다뤄보려고한다.
Here I'm using Junit4. The features I want to use have been improved and made more convenient in Junit5. I'll cover these in another post.
우선, 테스트 해 볼 클래스를 하나 생성하고 테스트 할 전체적인 클래스의 구성을 만든다
First, let's create a class to test and set up the overall structure of the test class
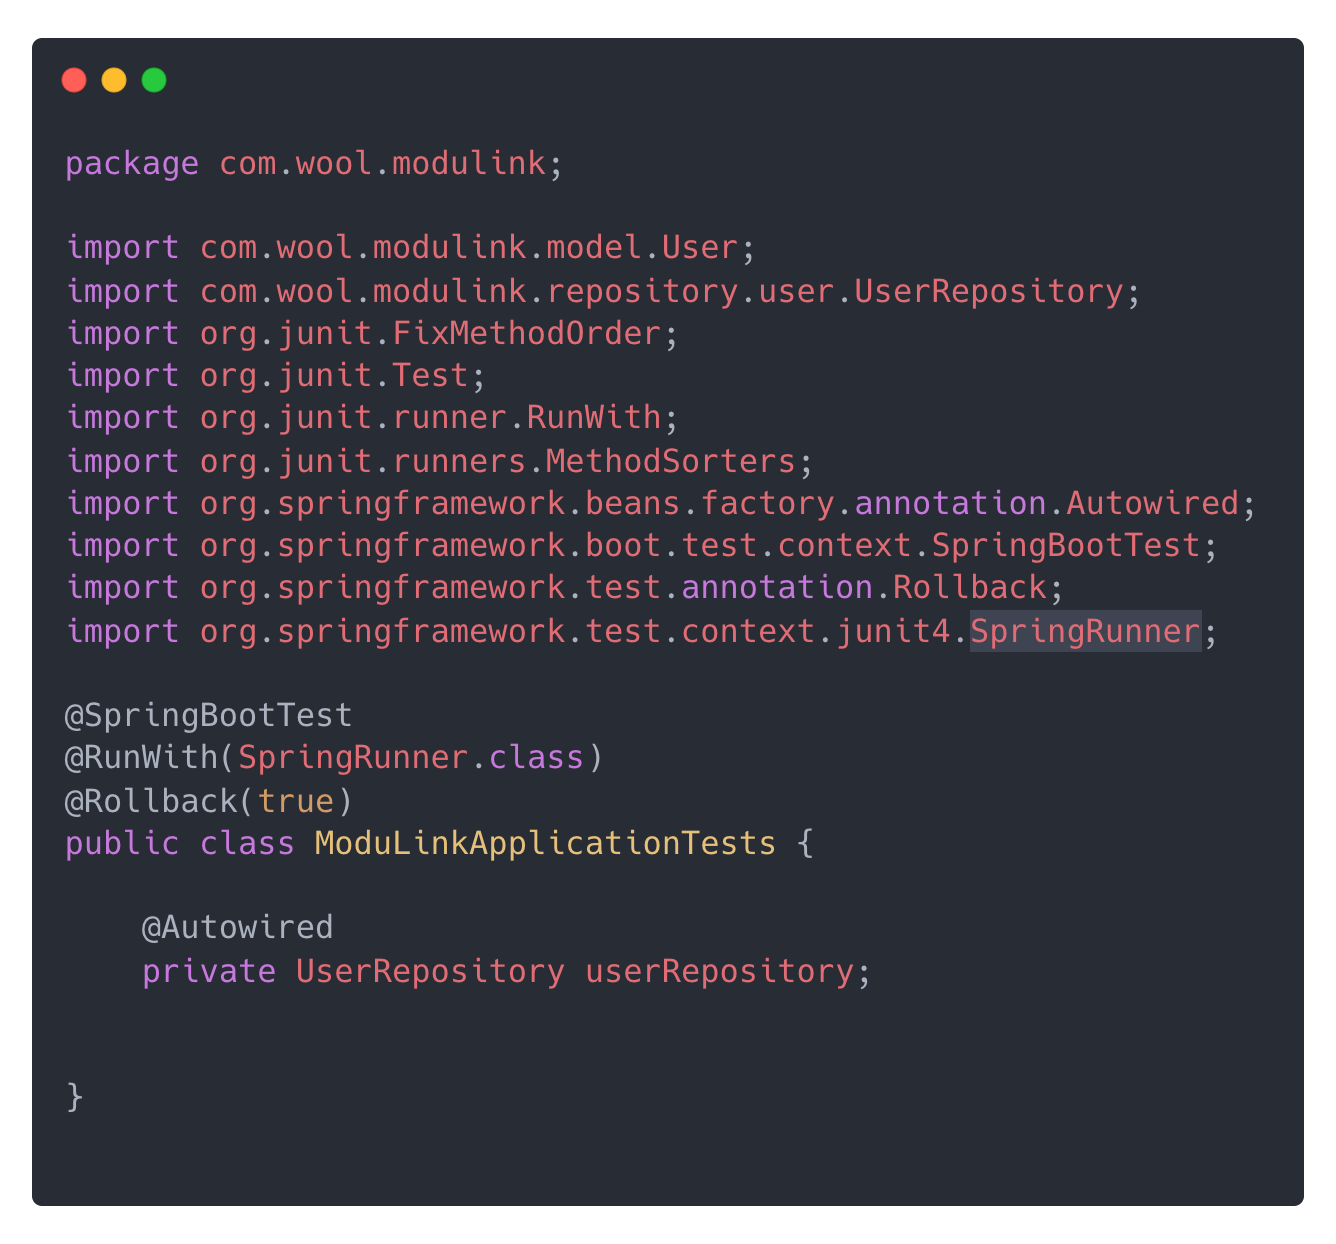
@Autowired 어노테이션으로 Repository를 연결 해 준다
Connect the Repository using the @Autowired annotation
Test Class에 새로운 @FixMethodOrder 어노테이션을 적용해서 테스트 함수별로 순서를 적용 할 수 있도록 작업 해 주려고 한다. 지금은 NAME_ASCENDING 옵션을 주었지만, 다른 옵션들도 있다.
I'm going to apply the @FixMethodOrder annotation to the Test Class to set the execution order for each test function. For now, I've used the NAME_ASCENDING option, but there are other options available.
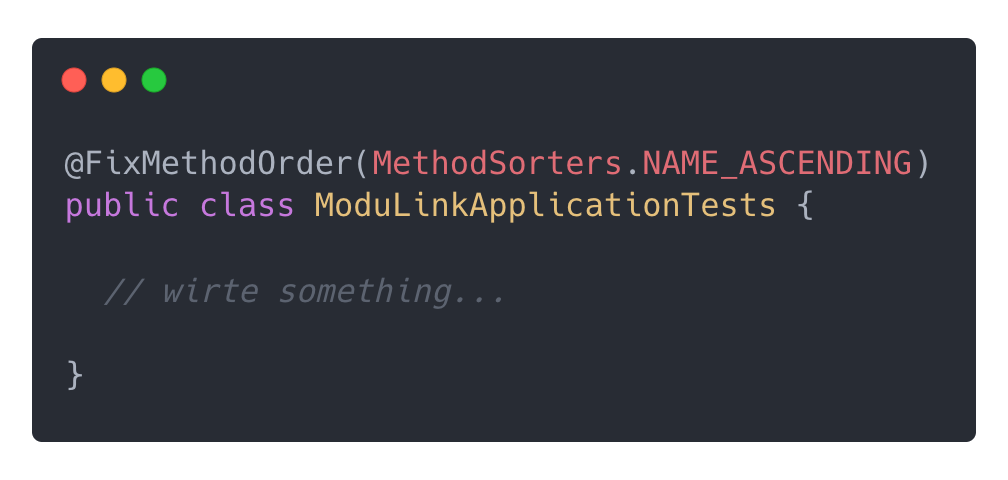
NAME_ASCENDING 옵션에서 알 수 있듯이, 테스트 함수이름에 따라서 정렬 해 준다. 함수 이름에 번호를 매기고, 어떤 기능을 할 수 있을지 대략적으로 나타내었다
As you can tell from the NAME_ASCENDING option, it sorts by test function name. I numbered the function names and roughly indicated what each function does

Test 함수 - Create
Test Function - Create
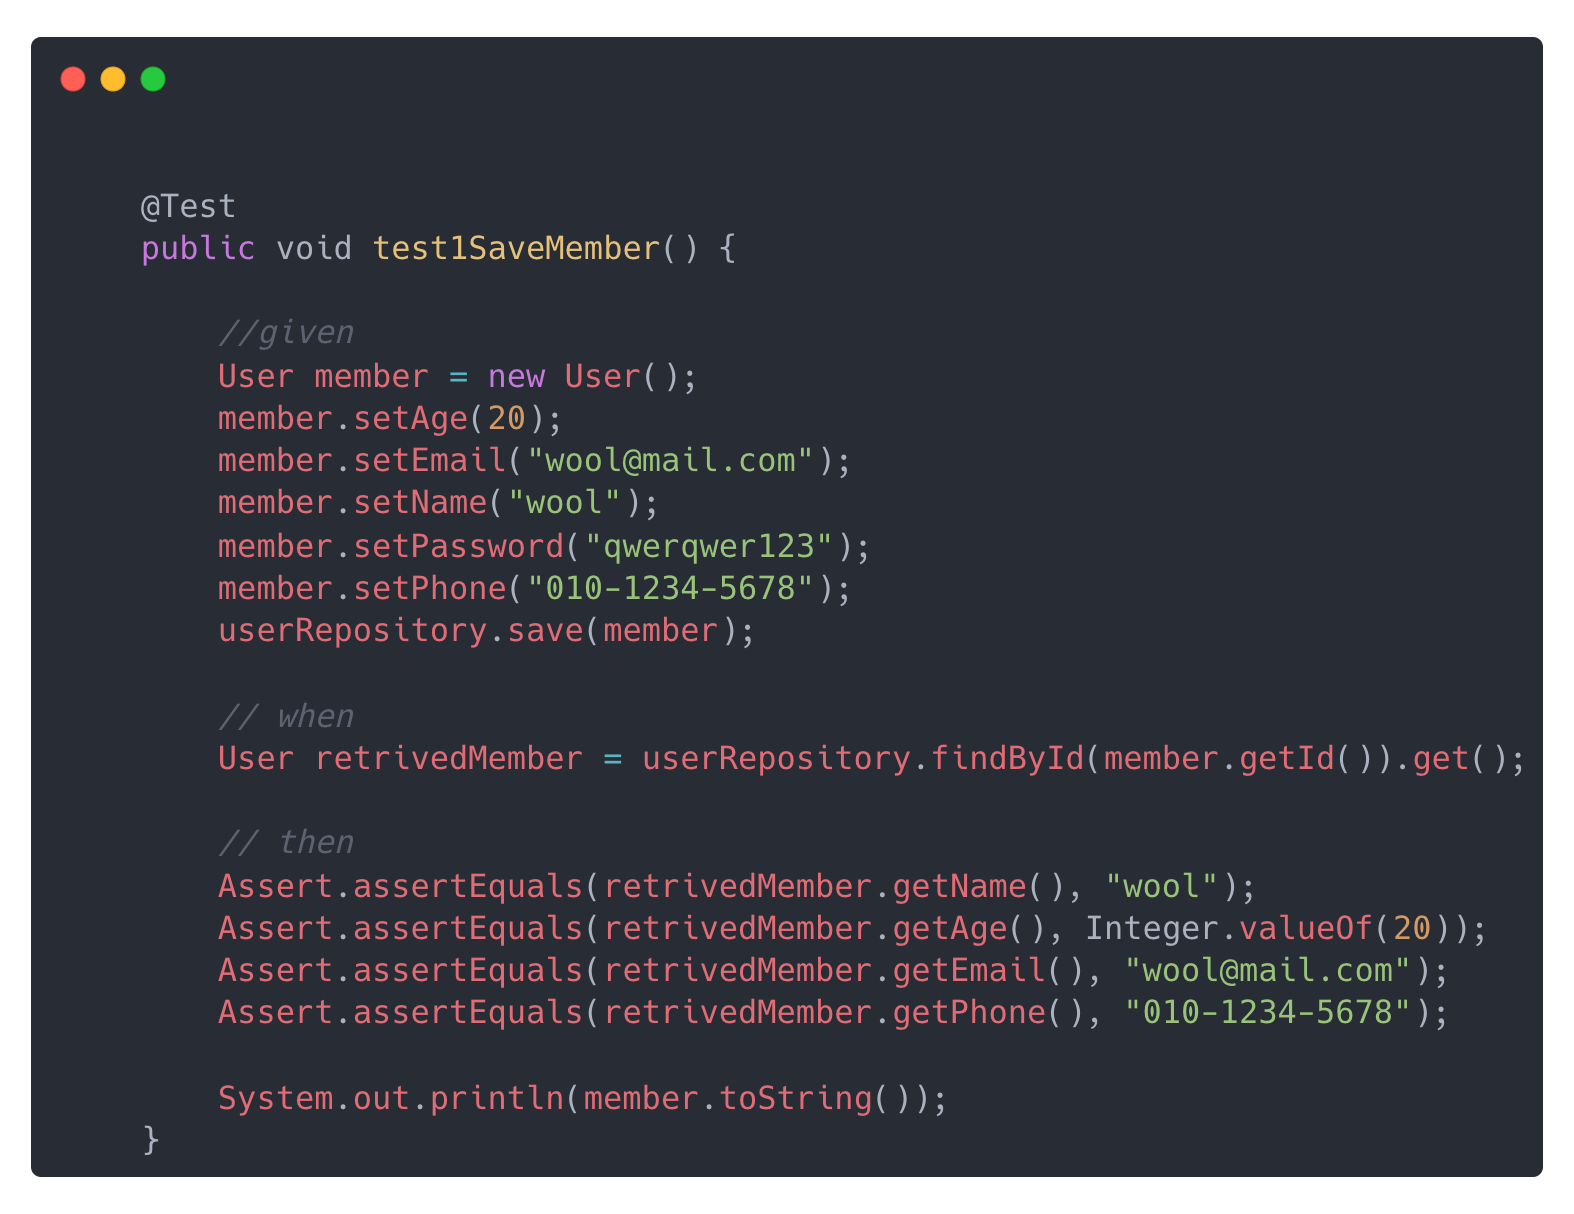
우선 뒤에서 Read, Update, Delete에서 사용할 데이터이니까 잘 확인 해 보도록 하자
First, let's verify this carefully since this data will be used in the Read, Update, and Delete tests later
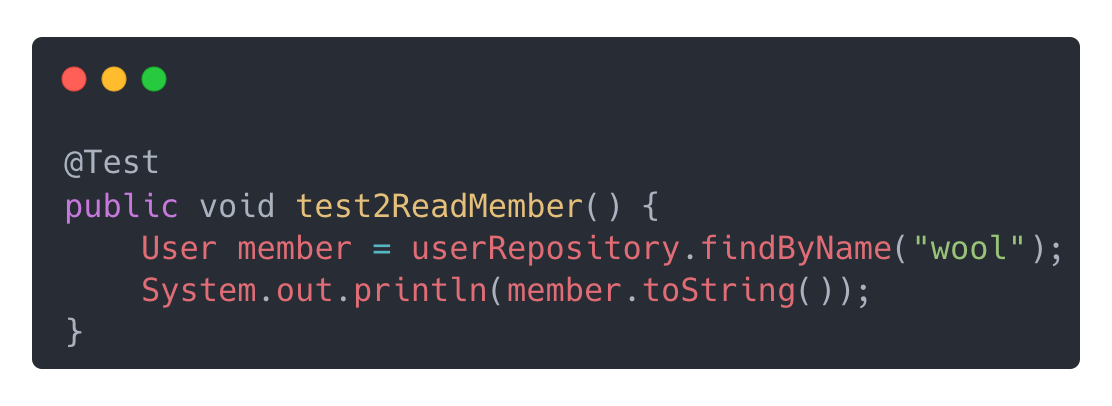
Test 함수 - Read
Test Function - Read
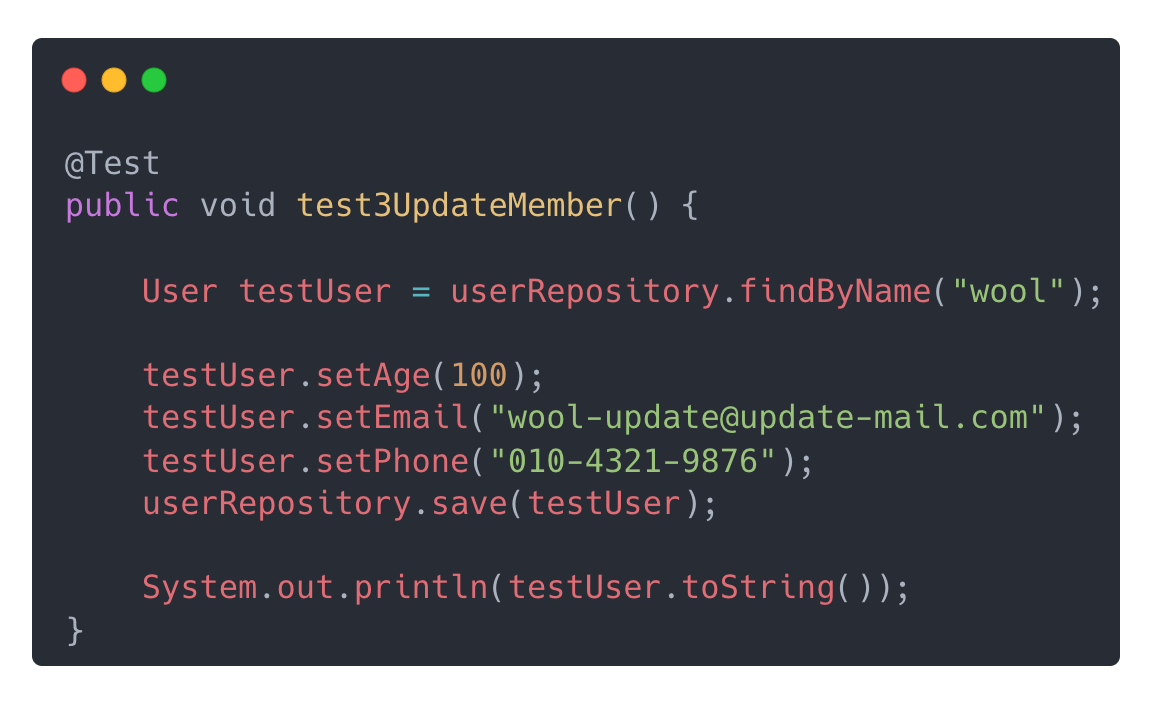
Test 함수 - Update
Test Function - Update
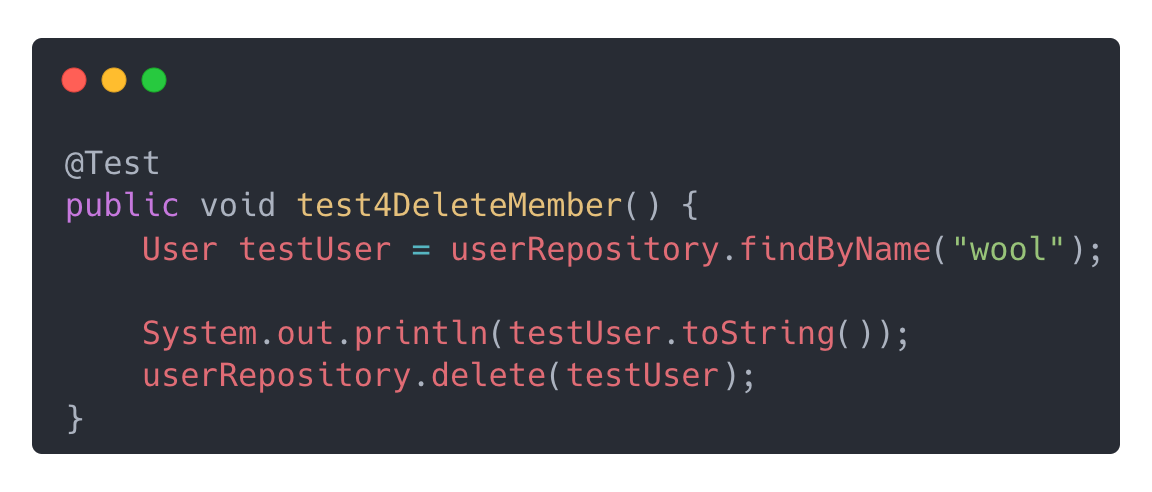
Test 함수 - Delete
Test Function - Delete