Kotlin을 사용해서 SpringBoot를 개발 해 보려고 한다.
I'm going to develop Spring Boot using Kotlin.
심심하기도 하고(?) 해서, Spring으로 다시 개발 프로젝트 하나 해보자! 라는 생각을 하게 되었고 만드는 김에 Kotlin으로 만들어보자 하는 생각이 들어서 시작을 해 보게 되었다.
두서가 없을 수 있지만, 개발하면서 찾아 보는 내용들을 정리해야겠다.
I was feeling a bit bored(?) and thought, "Let's do another development project with Spring!" Since I was already starting, I decided to build it with Kotlin.
This might be a bit scattered, but I wanted to document what I learn as I develop.
Spring Boot 와 Kotlin
세팅과 관련된 글은 이미 많은 분들이 작성 해 주셨기때문에 따로 적지 않으려고 한다. (다들 이미 너무 잘 정리 해주셨다)
LinkedIn 과 비슷한 프로젝트를 만들어 보려고 한다. 데모 프로젝트지만 많은 사람들을 연결 할 수 있는 경험들을 해 보고싶다.
Spring Boot and Kotlin
I won't write about the setup since many others have already written about it. (Everyone has already done such a great job documenting it.)
I'm planning to create a project similar to LinkedIn. Although it's a demo project, I want to gain experience in connecting many people.
Kotlin으로 Controller 작성하기
User와 관련 된 컨트롤러를 먼저 작성했다.
Writing a Controller in Kotlin
I first wrote a controller related to User.
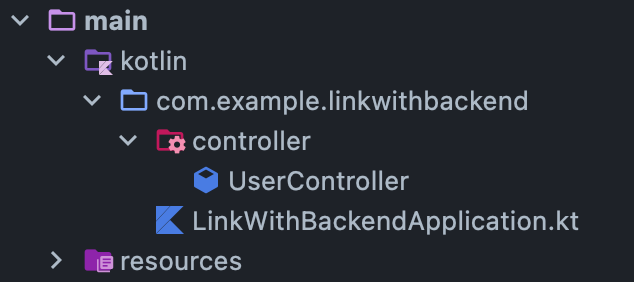
가장 기본이 되는 Application.kt가 들어있는 패키지 내에, Controller 패키지를 세팅하고 아래에 kotlin 파일을 만들었다.
Inside the package containing the base Application.kt, I set up a Controller package and created a Kotlin file within it.
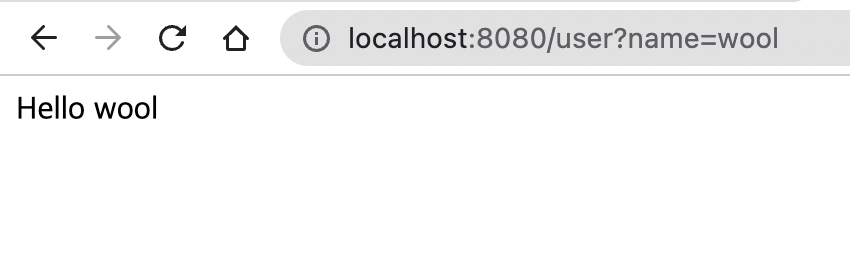
테스트니까, GetMapping에서 인사를 해보자 - queryParam
컨트롤러로 뭘 할까 생각하다가 GetMapping으로 간단하게 테스트를 해 보자! 라는 생각이 들었다. GetMapping으로 GET 요청들을 받아주려고 했고, 들어오는 queryParam을 정해서 확인하는 코드를 작성했다.
query parameter를 받아주는 어노테이션은 @RequestParam 이다.
Since It's a Test, Let's Say Hello with GetMapping - queryParam
While thinking about what to do with the controller, I thought, "Let's do a simple test with GetMapping!" I wanted to handle GET requests with GetMapping and wrote code to check incoming queryParams.
The annotation for receiving query parameters is @RequestParam.
package com.example.linkwithbackend.controller

import org.springframework.stereotype.Controller
import org.springframework.web.bind.annotation.*
import java.util.*

@Controller
@RestController
@RequestMapping("/user")
class UserController {

    @GetMapping()
    fun getUser(@RequestParam(required = false) name: Optional<String>): String {
        return "Hello ${name.orElse("World")}"
    }
}
Query Parameter가 안들어 올 수 있다는 생각을 했고, 그럼에도 잘 동작하게 하고 싶어 옵션을 주고싶었다.
이전에 Java기반의 Spring과는 다르게 (required=false) 로만 옵션을 준 것이 아니라, 파라미터 변수의 자료형에 Optional<T> 를 주었다.
변수(query parameter) 가 들어온다면 들어온 것을 보여주고, 아니라면 World 를 출력하도록 return 값을 만들어서 각각의 상황에 대응하도록 만들었다.
I considered that the query parameter might not always be provided, so I wanted to add an option to handle that gracefully.
Unlike the previous Java-based Spring approach where I only used (required=false), I also used Optional<T> as the data type for the parameter variable.
I created a return value that displays the variable (query parameter) if it's provided, and outputs "World" otherwise, handling each situation accordingly.
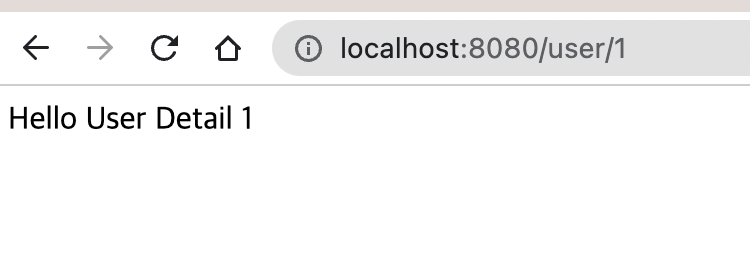
테스트니까, GetMapping에서 인사를 해보자 - PathVariable
Query Parameter 말고도, url path에 변수를 주는 방법도 체크 해 보자.
url들은 http://www.abcd.com/user/1 맨 뒤의 1과 같이, 나타내고자 하는 resource의 가변적인 변수를 주기도 한다. GET 요청에서 뿐 아니라 많은 곳에서 사용 할 수 있기에 한번 간단히 사용해봤다.
Since It's a Test, Let's Say Hello with GetMapping - PathVariable
Besides query parameters, let's also check out how to use variables in the URL path.
URLs sometimes include dynamic variables for the resource being represented, like the "1" at the end of http://www.abcd.com/user/1. Since this can be used in many places beyond just GET requests, I tried using it briefly.
@GetMapping("/{idx}")
    fun getUserDetail(@PathVariable("idx") idx:Int):String{
        return "Hello User Detail $idx"
    }
아까와 같은 컨트롤러 내부에서 작성을 했고, idx라는 변수를 PathParam으로 잡았다. 이 변수를 받아주는 어노테이션은 @PathVarable이고, 저장 했던 변수 이름을 그대로 사용하면 된다.
I wrote this inside the same controller as before and designated a variable called idx as a PathParam. The annotation for receiving this variable is @PathVariable, and you simply use the same variable name that was specified.
Next Todo
다음 포스트에서는 POST 와 관련된 친구들을 간단히 살펴보고, Return 객체를 잘 설정 해 봐야겠다. 그리고 이어서 간단한 느낌을 잡았으니 이제 사용자 정보와 관련된 기능들을 개발 해 봐야겠다
- 사용자 테이블만들기
- 사용자 CRUD
- 로그인
Next Todo
In the next post, I'll briefly look at POST-related topics and set up the Return object properly. Now that I've got the basic feel for it, I should start developing features related to user information.
- Create user table
- User CRUD
- Login